 |
||
| Quick Business search | Site Wide Search | |
How to ad a new post and Image to the blog
In order to add a new post to the blog follow the instructions below. These are the basics. By following these instructions you will be able to add a post, link and picture. You can play around with the more advanced settings once you got the hang of it. The only way to learn is by trying everything, don't worry you won't break it.
The first step is to login.
Please note that in order to post new posts you must have been approved
as an author. If you would like to add content to our blog you can let
me know at bokkomsupport@gmail.com .
To login go to http://www.bokkom.co.za/blog/wp-login.php using the username and password which you used to register with at http://www.bokkom.co.za/blog/wp-login.php?action=register
After you logged in you will be presented with a screen similar to the one shown below.
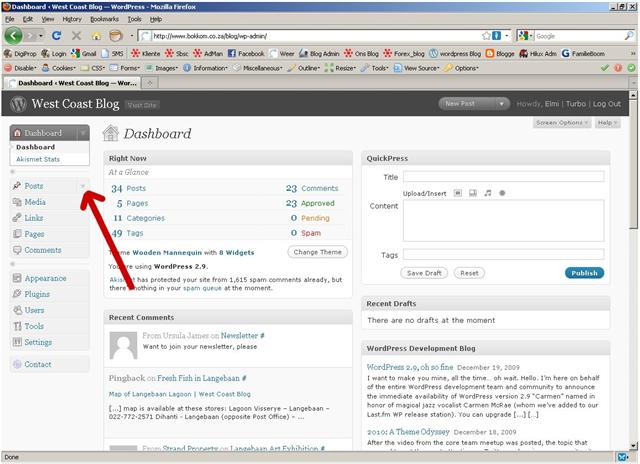
Click the arrow next to the "Post" menu in order to open the post menu.
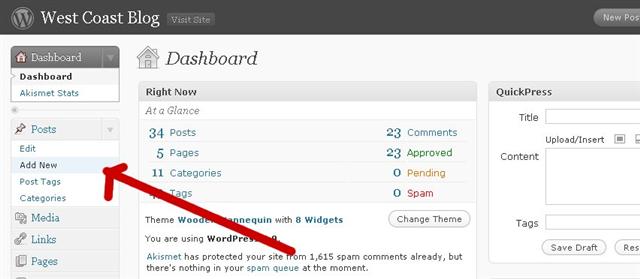
From the post menu select "Add New"
The window below will now open.
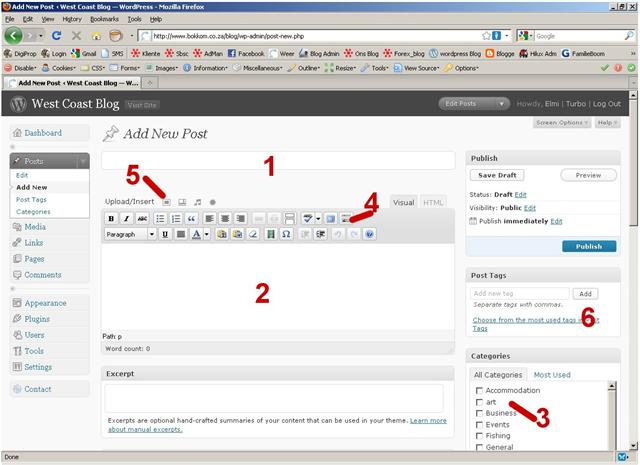
In this window you must (see points marked in image above):
- Add a title for your post, this must be a short title and the link to the page will be the same. If you write something about yourself you can put your name in the field. If the title is "Piet Pompies" the link to the page will be www.bokkom.co.za/blog/piet-pompies
- Add the content to your page. In the content you can add links to other web sites or pages or add a photograph or image. More about that later.
- You must select a category to put your post under. If there is not a suitable category for your post contact me and we can see if we can create one for you. If you do not select a category your post will be placed under the general category by default.
- If you do not see all the buttons shown in the picture above, click the button at point 4 above, that will open the other buttons.
- You will use this button to add images, more about that later
- Add a tag related to your post. This will normally be one or two words which users can search for to find your post. For example, art, artist.
I find it easier in the beginning to first create your new post with text only so that you get the hang of it. You can always add pictures later on.
To add an image:
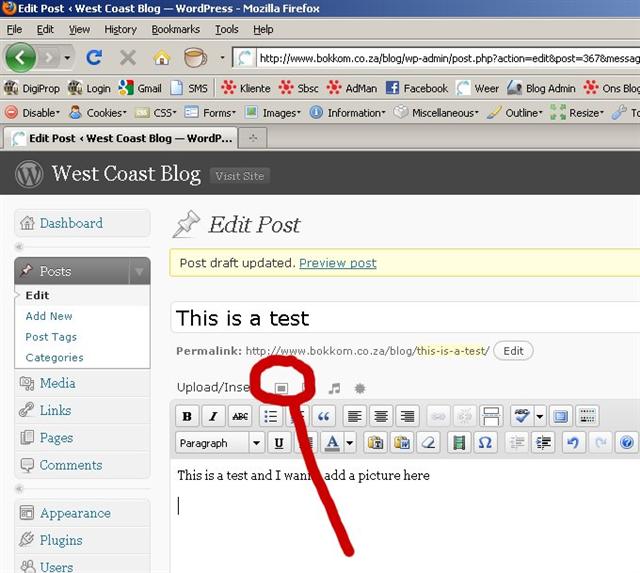
Click in the edit box at the place where you would like to insert your image.
Then click the image insert button as shown in the image below
If you click the image insert button window will pop-up which looks like the one below. In this window there is a button you can click to select the file you would like to add.
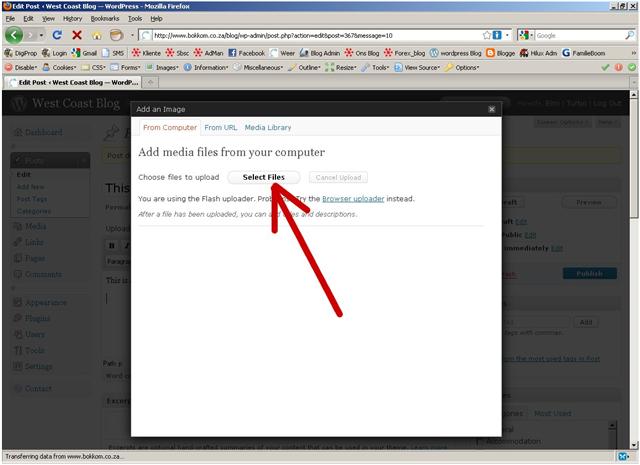
Click the button and select the file from your computer.
PLEASE NOTE: Although the software will resize your image to the required size it will be better if you can resize it before you upload it. This can speed up the process. The software only resizes the picture once it has been uploaded, so if you upload a huge file you will only be wasting your own time and bandwidth. If you do not know how to resize a picture read this article at http://pietpetoors.com/blog/resize-photographs/ . 640x570 pixels is big enough for pictures to be loaded onto the blog.
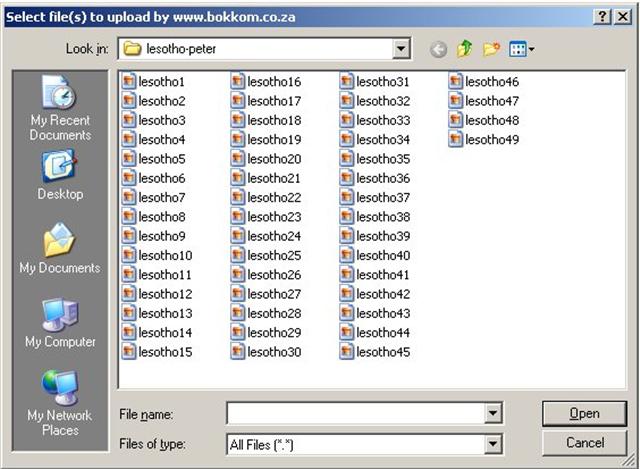
Once you selected the file and clicked the "open" button the follow screen will show the upload progress. Wait for it to fully upload the picture. It will automatically go over to the next screen once uploaded.

Once uploaded it will go to this screen
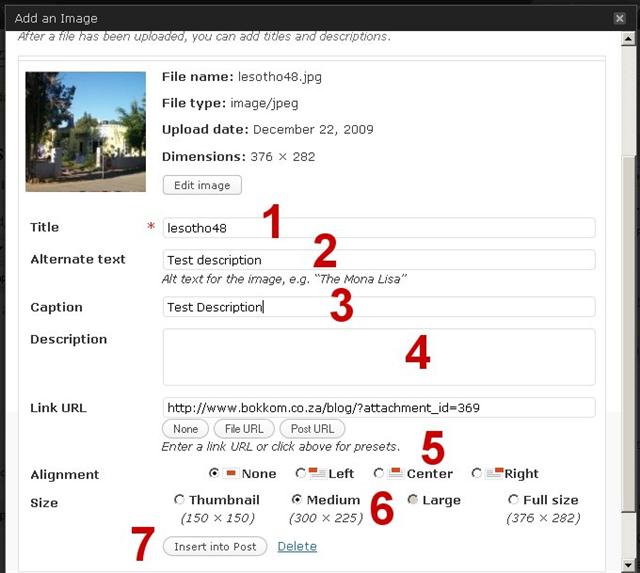
In this screen you can add some attributes to your image.
Fields 1 2 and 3 must be filled in. Field 4 is not that important. At 5 you select where the picture must be placed in the article, centre works best with the blog software. At 6 you select the size of your pic and once you completed all of above you can click the "Insert into Post" button at point 7.
The pop-up screen will now close and you will see your image in your post.
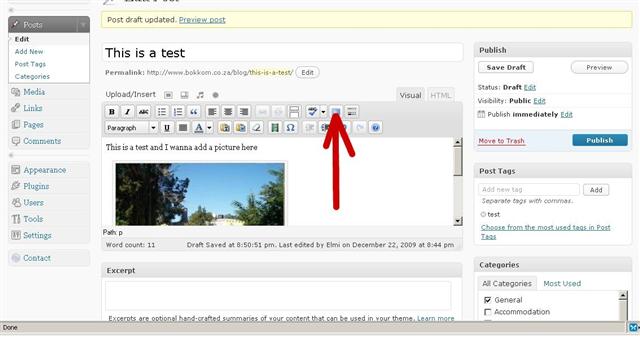
Note that the edit screen is a bit small and not easy to see your post. To switch to full screen view click the button showed at the arrow above.
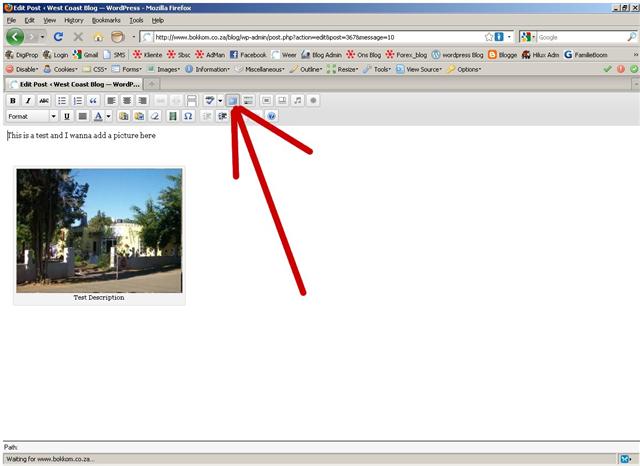
If you are in full screen mode you must first switch back to normal mode by using the same button before you can save or publish your post.
Adding a link to another page or web site
You can also link the text in your article to another web site or web page. This how to do it:
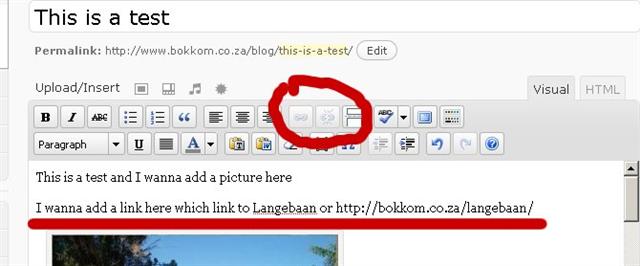
If you look at the image below you will note that if no text are selected the hyperlink button is not click able.
Select the text you would like to link to another page and you will see that the hyperlink button immediately becomes click able.
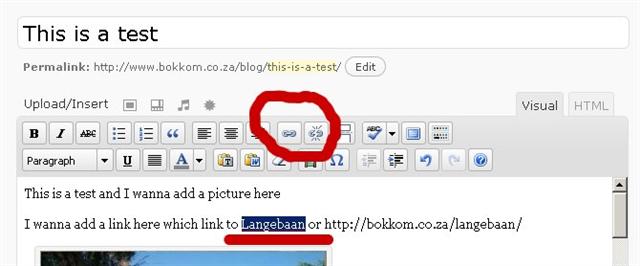
Now click the left one of the two link buttons as indicated above. You will note that a small window will pop up.
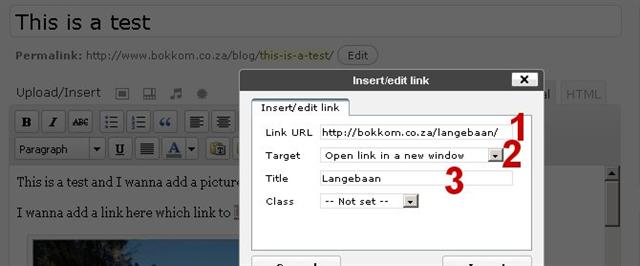
- At point one enter the link which you would like to link. Note that you MUST always start with http:// otherwise it will not work.
- At point 2 select whether you would like the page to open in the current page or in a new window. If you would like your visitor to easily come back to your original page it is better to select "in new window"
- At point 3 enter a Title for the link, this will also be a short description normally of one to four words.
- Once finished click the "insert" button at the bottom of the pop-up screen. The screen will disappear and you will note that the text are now linked.
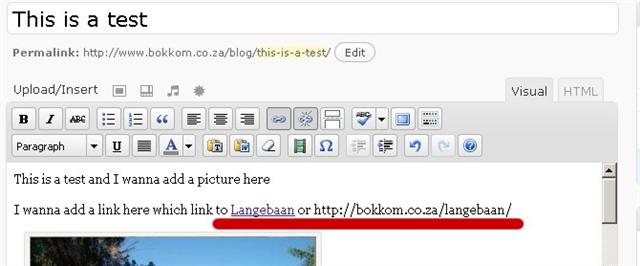
You can link a word or some words to another page or if you would like visitors to see the actual link you are linking to you can even include the whole link and link that to the other page as shown above.
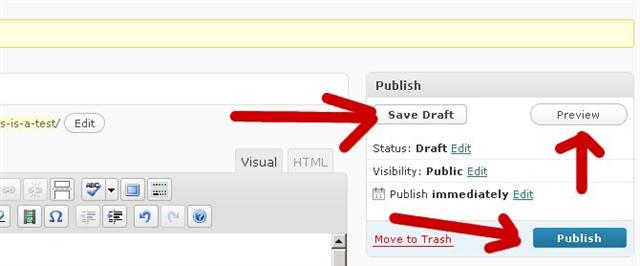
Save and Publish
Once finished you can either save your work and continue with it later or you can publish it. See image below. If you save as draft the post will not be visible to the public. Your post will only be visible on the blog once you pressed the "publish" button. You can even preview your post before you publish it.
If you created a page and would like to publish it immediately you do not have to save first and then publish, you can hit the publish button immediately if you are sure that everything is correct.
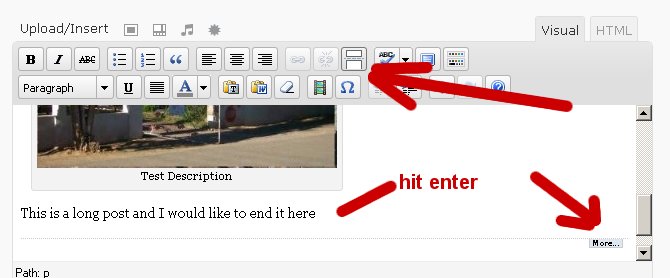
One last trick - adding an excerpt
The main page of the blog displays the last 10 posts posted. If you have a looong article it will stuff up the front page of the blog. In order to show only a short excerpt of your article do the following:
Once you completed your article look for a suitable place
to cut off your article. This can be after your first picture or where
ever you feel is a good place. When you enter the excerpt line the blog
will automatically add a line which says
"Read more »" with a link to your actual article.
To do this, find the place where you want to cut your article. Then hit enter once to create an extra line.
Now click the excerpt button as indicated in the image below. Once you clicked the button the software will add a line underneath your text and it will display the word "more" at the end of the line. This indicates where your post will be cut. That is all you have to do, now save or publish your article. I normally leave this step for last.
Happy blogging
